Friday, June 15, 2012

Fixing Curled Toes

A couple weeks ago, I posted pictures of my little coronation sussex that I helped hatch. Initially, I was deeply regretful that I'd helped her out; she seemed really in rough shape at first. As she dried off though, I realized her toes were a bit curled. Many people theorize that this can be caused by a delayed hatch. So, I'm trying to console myself with the fact that if I hadn't helped her out, it would've been worse. Maybe this is true, maybe not. I plan to stick with it, and it will cause anguish in future hatches when I have another chick taking its' sweet time.

Leaving cause behind, the fact remained that Chloe had some curled toes. Not a severe case, but a noticeable case nonetheless. I've had a couple chicks have curled toes, but they usually straighten out the first 24 hours or so. Not so, with Chloe.  Here's a picture of her feet at 48 hours old.
The left was definitely worse than the right.

I used electrical tape to create a boot of sort. I cut a small piece of tape, and carefully put the foot down onto the sticky side, making sure they were in the correct alignment.  Then, I cut another piece of tape and put that over the top, again, being very careful to make sure the toes were perfectly straight and aligned the way they ought to be.
She definitely was NOT happy about it.
I kept the boot on for about 20 hours or so. I was going to be gone the rest of the next day and evening, and didn't want to keep it on when I couldn't be keeping an eye on the chick. So, I saw definite improvement. Maybe it should've been left on longer, but I felt it was better to risk not having a full recovery- I felt like the chick was slipping a bit, and at risk for developing a splayed leg.


Here's how it looked after the first boot:
Definite improvement, but again, not perfect.  After I finished my hectic weekend, I decided to tape again.  This time, I left the tape on for 3 days or so. Again, I only treated the left foot, the right I just left alone because it just didn't seem that bad.


This is a few days after the second taping, the chick is 16 or so days old.
She is trying to run away from me here, so her stance is a little odd, but this is an action shot.


(oh, and FTR, I have no idea if this chick is a cockerel or a pullet, but I like to think positively, so I refer to the chick as "she")

Wednesday, June 13, 2012

A new and improved coop

Because of my little chicken problem, my husband decided I needed a new chicken coop. He's an engineer, and great with math, so it didn't take much to see the writing on the wall. At the moment, I have 25 chickens. Not all are permanent. My plan is to sell off 6 of the 7 BLRW chicks, and 2-3 of the preschool chicks. So, I figure I'll have 15-16 permanent chickens.  Even so, 16 chickens will not comfortably fit in our current coop.

He designed a nice coop that will go on the other side of the shed. It is 8'x8'.  The run around it will be approximately 16'x20'. It will connect to the other coop, but with a small door. That way, if I do need to separate groups, it won't be hard. I'll still have my chicken tractor too, which has been extremely handy for growing up chickens- too big to be inside, too small to hang with the big girls.


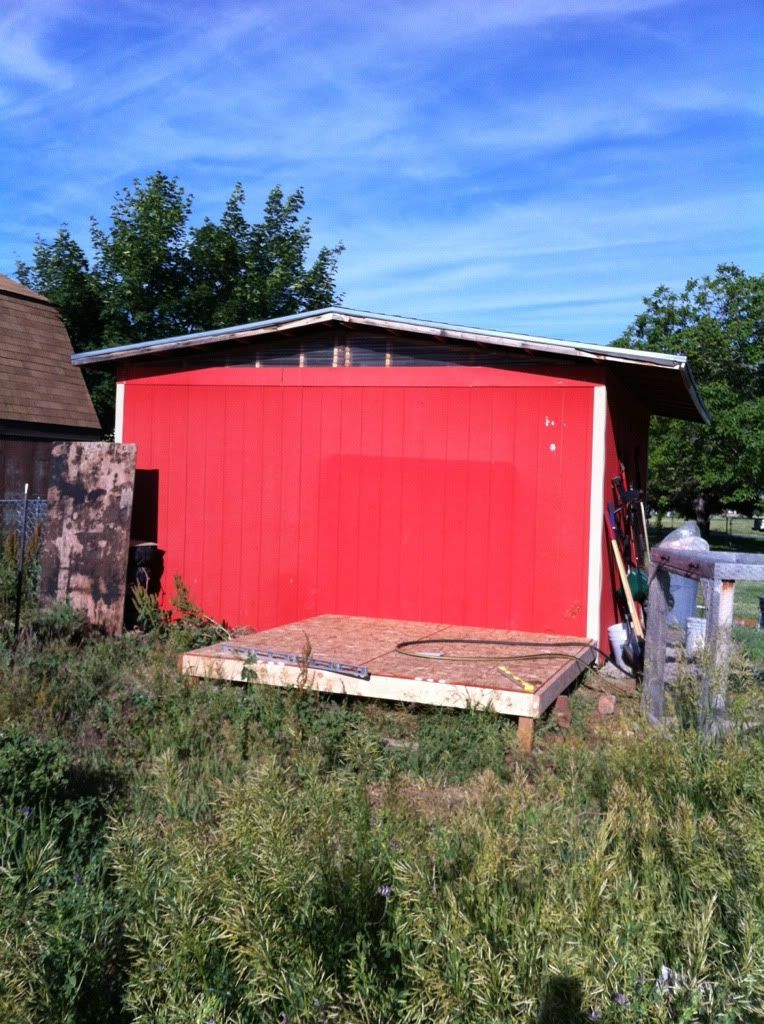
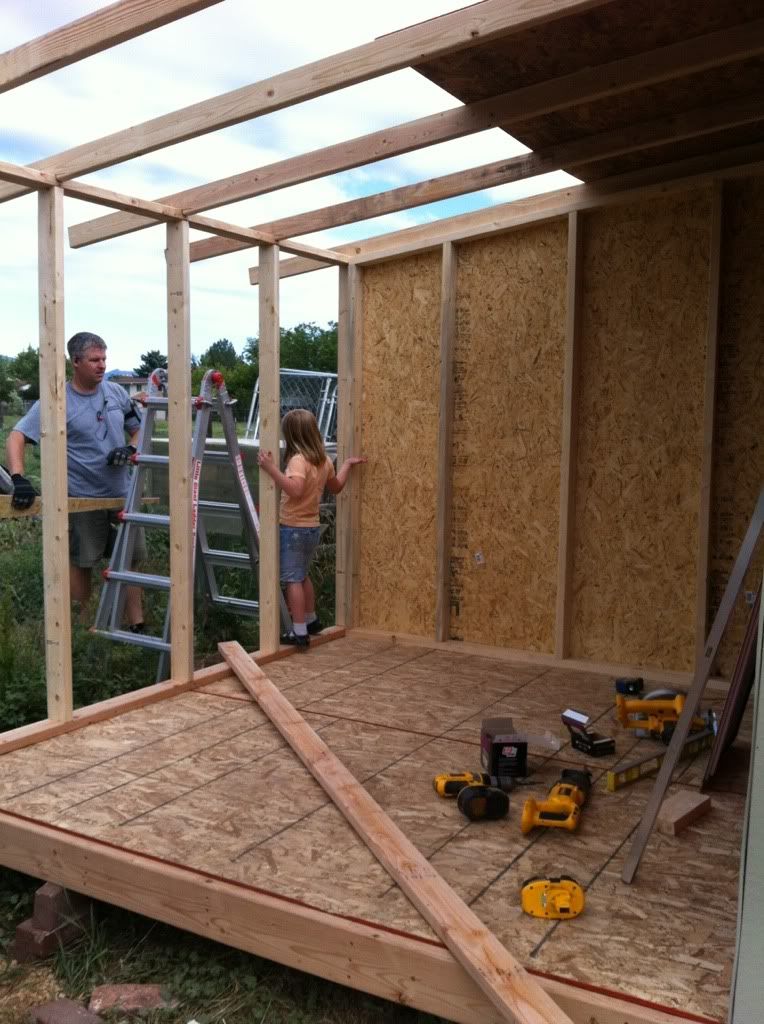
Here's the foundation of the coop.  It's butted up against our storage shed.  If I'd been there when he started, I would've asked that he raise it up a little bit so the chickens could easily go underneath- have it be maybe two feet off the ground. Because it's lower, I think I'll use chicken wire to block it off so nobody gets any funny ideas about laying eggs under there.


Finished framing, and starting to sheath it.


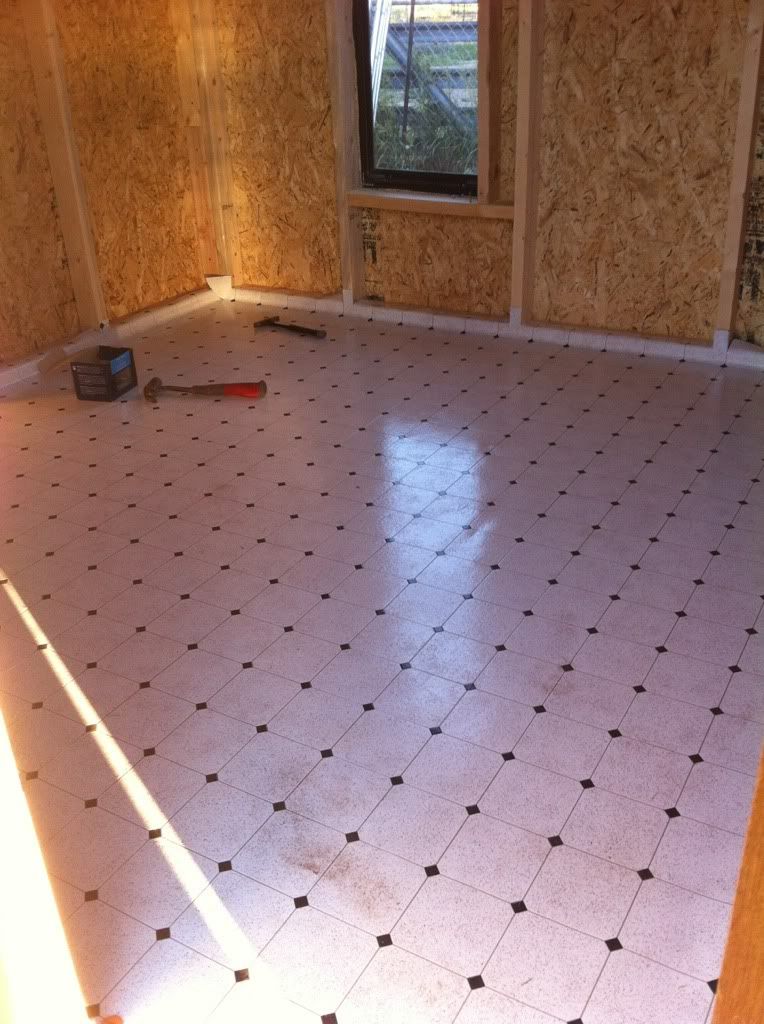
We bought some vinyl/linoleum to go on the bottom of the coop. I think it'll be easier to clean than wood, and last longer. I bought an 8x12' piece from Home Depot that cost about $50 after tax.  The window you see in the background came from Habitat For Humanity's ReStore, which is a home improvement thrift store. I got the window and a door with the necessary hardware and spent under $10. Excellent!


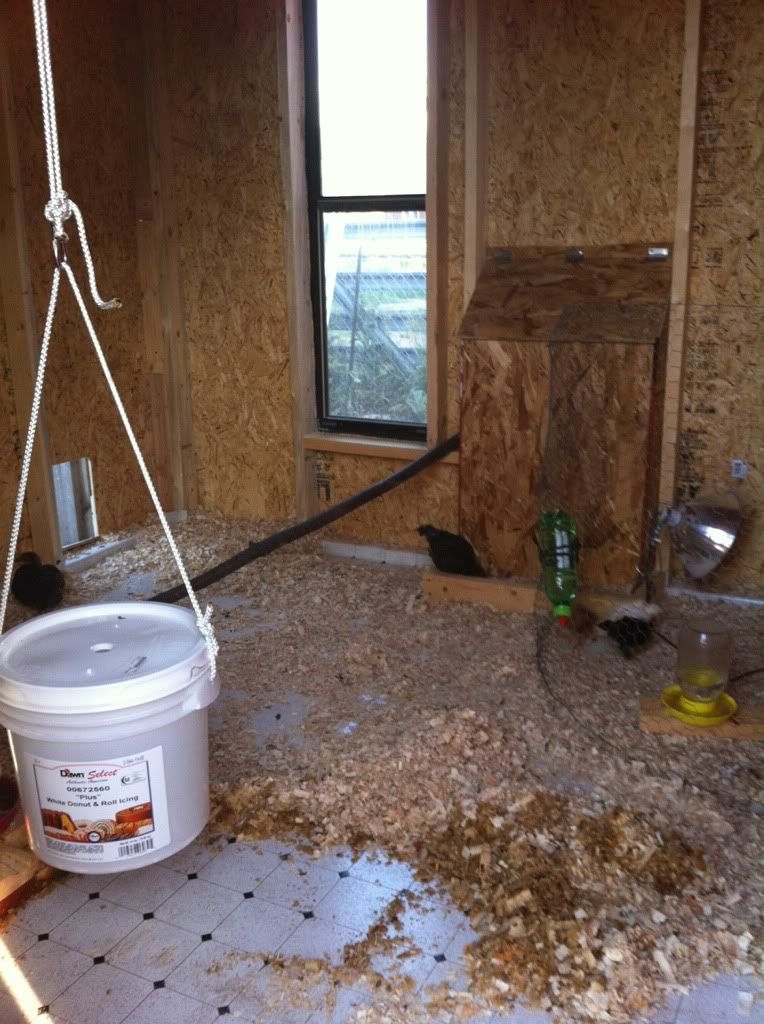
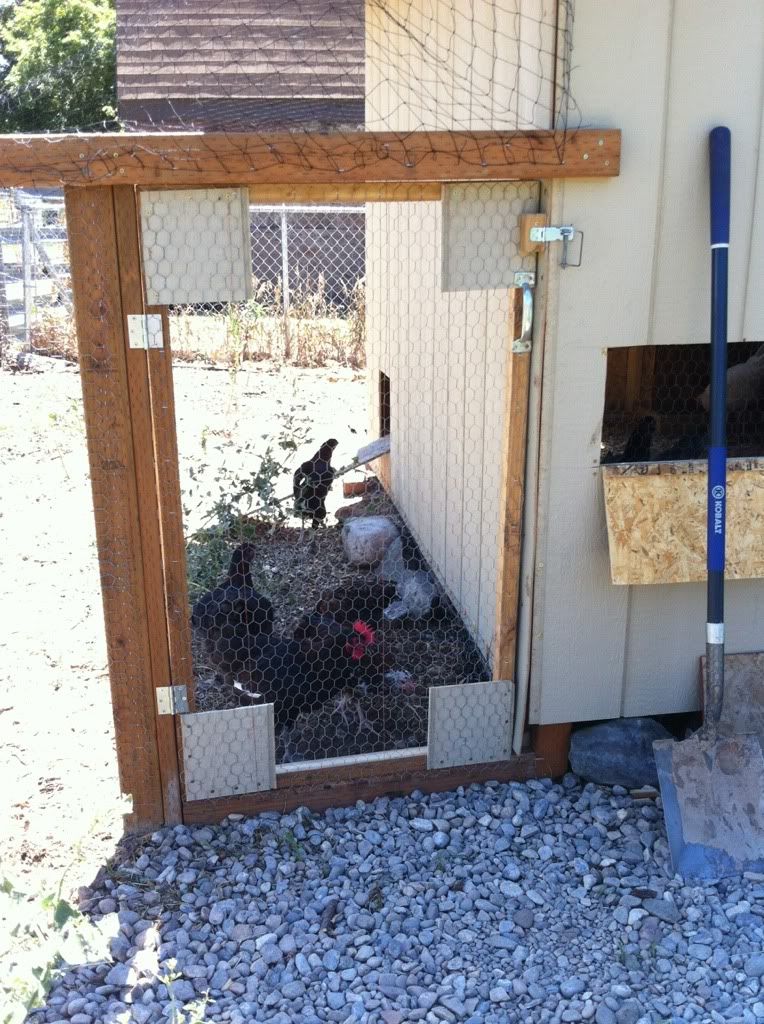
Here's the completed interior. In the corner next to the feed, I've stapled up some chicken wire, making a "time out" corner for smaller/injured/new birds so that they can see everyone, but aren't in any danger of getting beat up by the bigger birds.


Here's the door to the enclosure:


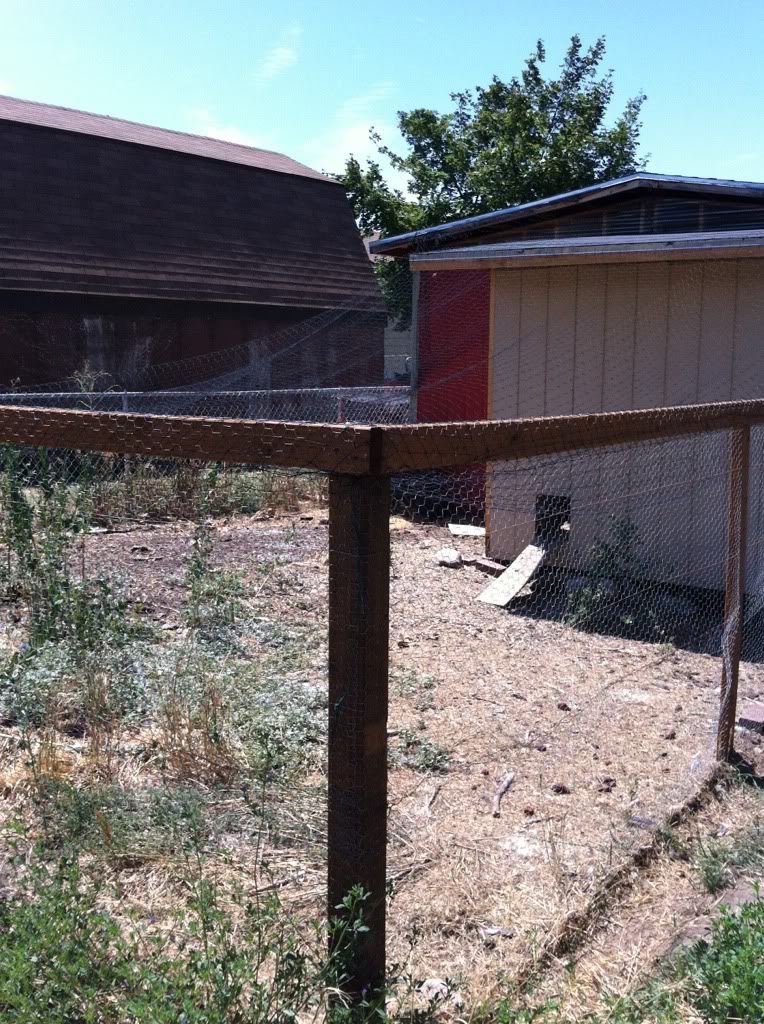
16x-20x enclosure.  The sides are a strong guaged chicken wire.  When building it, we used pressure treated lumber so it would withstand the elements a bit better. We also dug a trench a foot deep around the enclosure and buried the chicken wire so that digging under would prove more difficult.


The top of the enclosure is a bird netting that I bought on Amazon.  We wove it through the chicken wire and stapled it on really well to the posts around the enclosure and the roof of the chicken coop with NO gaps so that it could support some weight. It is a little loose though, so if something did try to think about crawling on top, it would be more like a hammock or safety net, so extremely UNATTRACTIVE to walk on. I've read that raccoons don't like unsteady surfaces, so I'm hoping that be having a floppy, soft, sinking surface, they won't  try to climb on top. It's secure enough that I'm sure it could take a medium to large size dog. Said animal would be hopelessly ensnared, but the chickens ought to be safe.

Friday, June 1, 2012

Ms. C's final hatch report

When I went in Wednesday morning, I was pretty sure that the hatch was done- I'd figured Chloe hadn't made it.  I was surprised to see her little beak moving around the pip hole when I got there, and I got my hopes up again. I waited all day for Chloe, the Coronation Sussex to hatch. By 6pm, I was very worried because the membrane was getting very stiff and dry, and it seemed like she wouldn't make it on her own. I helped her hatch, and had 3 or so drops of blood, which had me deeply, deeply upset and regretful.  I left her in the incubator overnight, hoping she'd be ok.

Thursday morning I came in, and she was still alive. She was crispy instead of fluffy, so I very carefully rinsed her off with warm water. That helped, but even after she was dry, she wasn't too fluffy. I used a toothbrush to very softly comb her off, and that made her fluff right up. I noticed her toes were a little curled, but I've seen that happen a few times, and they straightened out on their own. We're coming up on 48 hours old now, and they're not all better, so I'm starting to think I need to treat them. -sigh- That is a symptom of too long in the shell, so maybe I was right to help her out, even though I've been second guessing that. Here is her toes now.


And, to introduce the chicks.


 First to hatch was Shirley, who came out of a medium brown egg. She/he looks like a black copper marans, except the legs are clean.


Next to hatch was Emily, who came out of a very dark olive egg. I wasn't able to see a thing in this egg, and had no idea if it was viable til she pipped.


Last, but not least is Chloe, a coronation sussex. She's the only purebred of the group.